RudderCuff_1
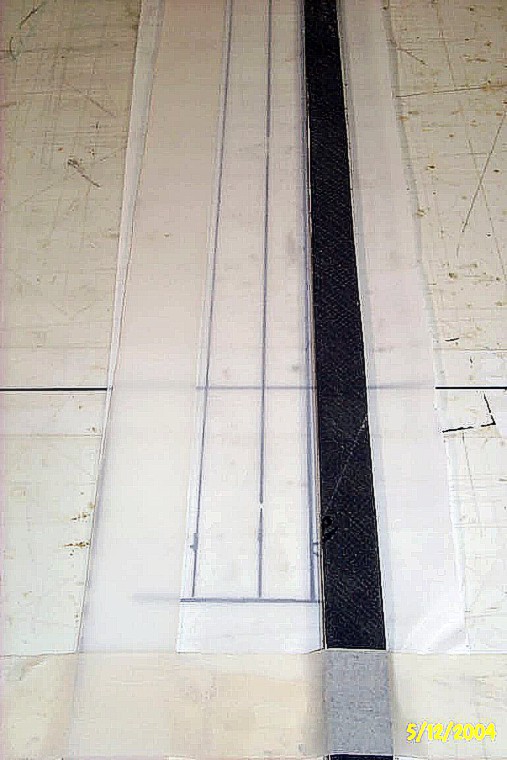
Rudder Cuff - "Micro Layup" 1 Laid out max and min rudder travel lines on both sides of the cuff. Estimated the thickness of the micro that would be needed to close the gaps and laid it out on a piece of plastic sheeting and taped it down to the table. We then put a piece of peel ply down over that, stretched it gently and taped it in place on both ends. We needed a taper from the aft line to the fwd line on the cuff so we laid a piece of 1/8" scrap along the fwd line and a piece of 1/16" HDPE scrap along the other line. We then filled the space between the two pieces, smoothed it down with a trowel and after scoring along the pieces of scrap we took the fences off and took the peel ply with the micro out to the hangar. We had wiped on a thin coating of resin on the cuff and then, keeping the peel ply taught, we flipped it over and laid the thin edge along the aft line on the cuff and the thick side laid down on the fwd line. We gently smoothed the thin side to a taper and using a squeegee, we very gently smoothed out the peel ply. When it dried, we had a nice length of constant cross-sectioned micro along the entire length of the cuff. When we put the rudder on, the gaps were sanded with a thin file to get Tim's "minimum" of 0.080" . The right side was great but we had to do another "micro layup" to close the gap more on about the lower half of the cuff. This method may take a bit more time, but the micro's shape and cross section stay darned close to perfect.
Comments
Photo info
Available RSS feeds
Popular tags
- 1 photos are tagged with aileron
- 1 photos are tagged with casting
- 2 photos are tagged with counterweight
- 2 photos are tagged with Demo
- 1 photos are tagged with elevator
- 1 photos are tagged with ES
- 2 photos are tagged with Factory
- 1 photos are tagged with inventory
- 1 photos are tagged with John
- 7 photos are tagged with Lancair
- 2 photos are tagged with loading
- 1 photos are tagged with parts
- 4 photos are tagged with pre build
- 2 photos are tagged with Ride
- 1 photos are tagged with Ron
- 6 photos are tagged with Schroeder
- 1 photos are tagged with Super
- 6 photos are tagged with Super ES
- 6 photos are tagged with Szot
Random image